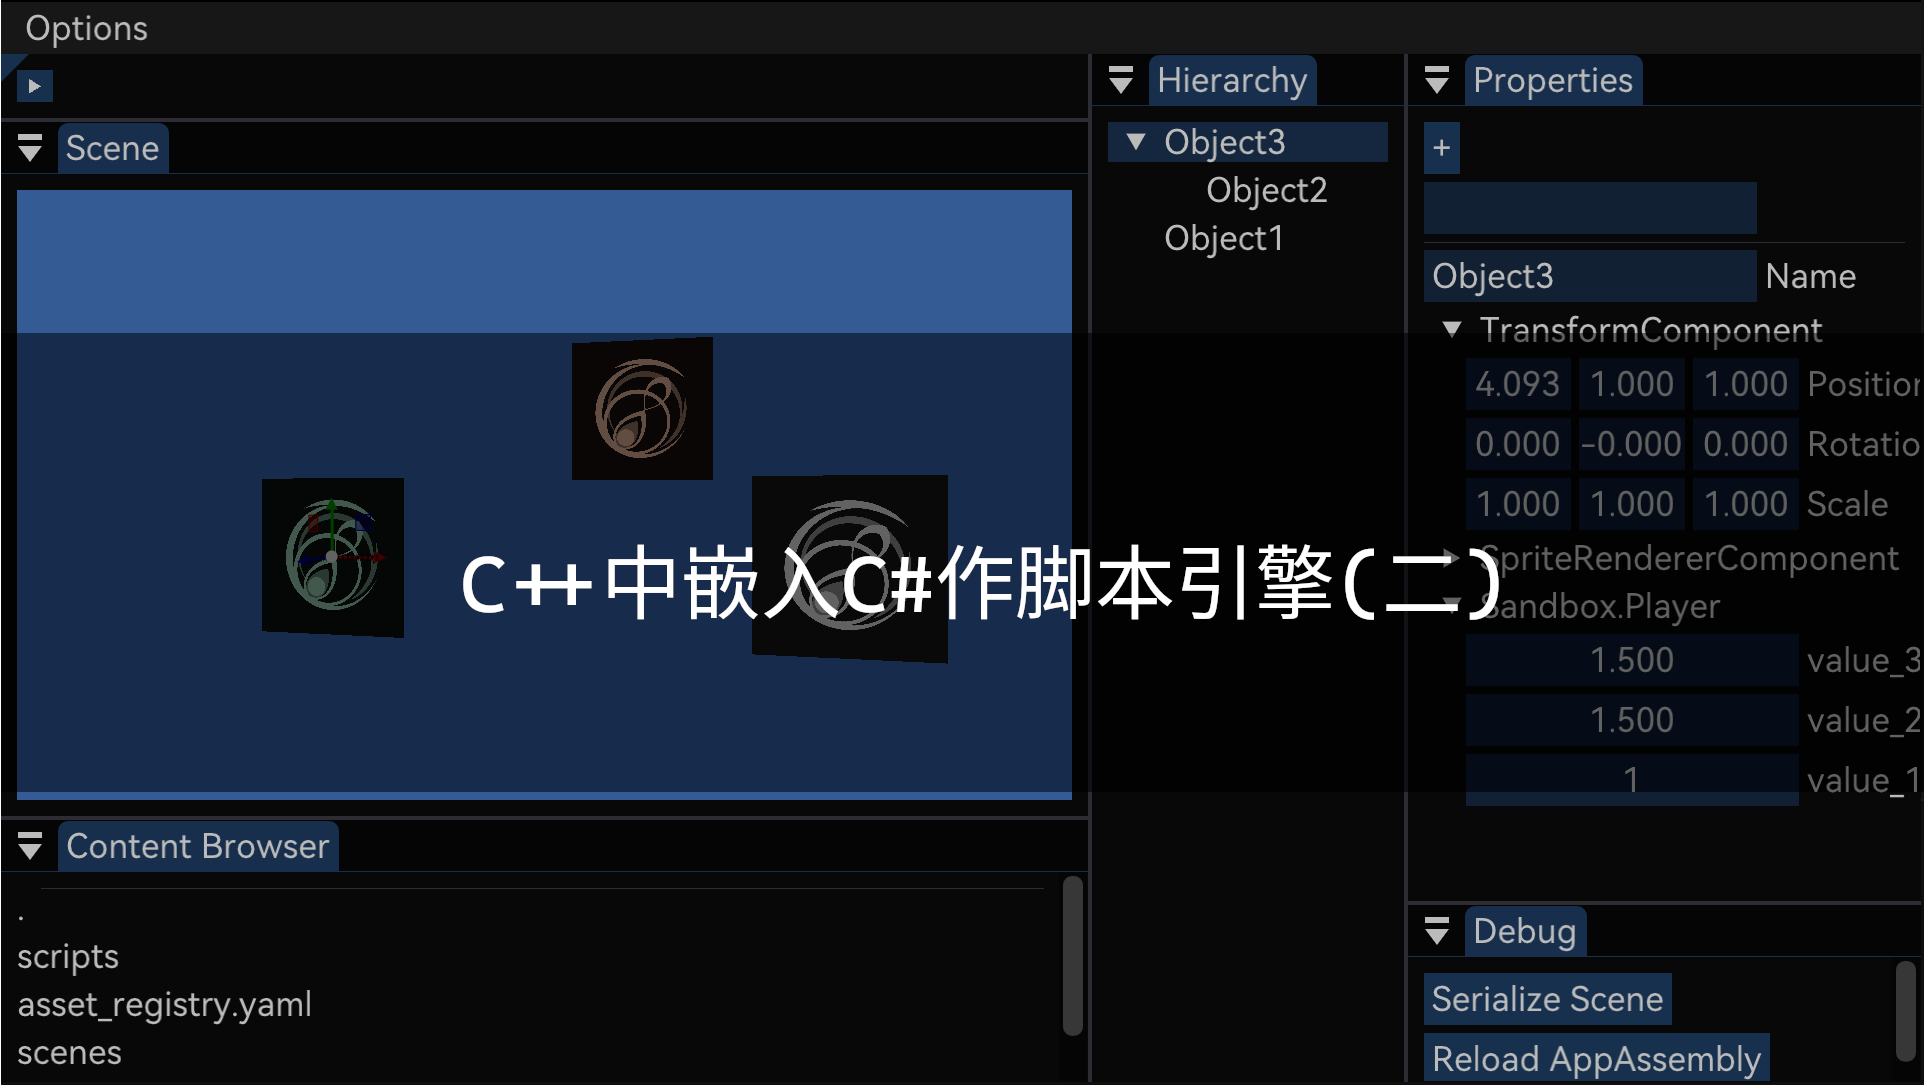
在游戏引擎中,很多常用的功能需要用到反射系统。例如在Unity的Inspector面板中,可以直观地看到每个Component的属性,并且在编辑器中实时修改;又比如在保存和加载游戏场景时,需要用到对游戏对象的序列化与反序列化。保存时,通过反射将各组件的属性转化成文本数据存储到json,yml或toml等文件中;加载时,解析文本文件并由反射系统创建游戏物体。
反射 (Reflection )是程序在运行时检查和修改自身结构和行为的能力,C++本身不支持反射,虽说有C++26的静态反射提案,但是离主流编译器支持还早。开源社区中有比较知名的反射库如rttr ,CPP-Reflection (即GAMES104中的反射系统的参考),在此我想从头开始实现一个很简易的反射系统,并通过Clang实现一个代码生成器,解析并自动生成反射代码,这样的功能正是一个游戏引擎必不可少的。
学习过程中参考了GAMES104的Piccolo引擎 以及Nickel Engine 中的反射部分。后者的作者也有一套简单的C++反射教程 ,强烈推荐。详细了解C++反射请看写给C++程序员的反射教程 。
动态反射系统
C++反射一般分为两种,静态反射和动态反射。静态反射是在编译期完成的,涉及到大量模板元编程的trick,而动态反射需要在运行期注册所有需要反射的类,但是使用起来更符合直觉,并且更灵活(可以运行时修改)。游戏引擎中由于要支持反射信息的实时修改,多用动态反射。接下来笔者会详细介绍实现动态反射系统的思路。
元数据类型
首先,我们要定义对于每个类型,反射系统需要获取哪些信息,因此可以定义一个基类Type来表示最基础的类型,派生出各种不同类型作为子类,如基础类型Fundamental,枚举类型Enum,字符串类型String,列表类型List,类类型Class等。
其中,基类Type需要存储这个类型的名字和具体分类(用一个枚举表示),声明如下:
1
2
3
4
5
6
7
8
9
10
11
12
13
14
15
16
17
18
19
20
21
22
23
24
25
26
27
28
29
30
31
32
enum class TypeCategory { Unknown, Fundamental, String, Enum, List, Class, Property }; class Type { public : virtual ~Type () = default ; Type (TypeCategory category) : category (category) {} Type (const std::string &name, TypeCategory category) : name (name), category (category) {} template <typename T> requires std::derived_from<T, Type> const T *As () const ; std::string GetName () const { return name; } TypeCategory GetCategory () const { return category; } private : std::string name; TypeCategory category; };
之后就可以继承Type类定义各种类型的子类了。
基础类型Fundamental声明如下:
1
2
3
4
5
6
7
8
9
10
11
12
13
14
15
16
17
18
enum class FundamentalKind { Unknown, Bool, Char, Int8, Int16, Int32, Int64, UInt8, UInt16, UInt32, UInt64, Float, Double }; class Fundamental : public Type{ public : Fundamental (const std::string &name, FundamentalKind kind); FundamentalKind GetKind () const { return kind; } private : FundamentalKind kind; };
这里的写法仁者见仁,对于基础数据类型的枚举项可以灵活定义。
字符串类型String声明如下:
1
2
3
4
5
class String : public Type{ public : String (); };
(简单起见,没有加入对string_view的支持)
枚举类型Enum声明如下:
1
2
3
4
5
6
7
8
9
10
11
12
13
14
15
16
17
18
19
20
21
class Enum : public Type{ public : struct Item { std::string name; int value; }; Enum (); const std::vector<Item> &GetItems () const return items; } Enum &Add (auto value, const std::string &name) { items.emplace_back (name, static_cast <int >(value)); return *this ; } private : std::vector<Item> items; };
这里用一个结构体Item来存储枚举项的名称和值,维护一个vector存放所有枚举项。
列表类型(理论上包括array, vector, linked list这些,我们仅考虑vector)声明如下:
1
2
3
4
5
6
7
8
9
10
class List : public Type{ public : List (const Type *elemType) : Type (std::format("std::vector<{}>" , elemType->GetName ()), TypeCategory::List), elemType (elemType) const Type *GetElemType () const return elemType; } private : const Type *elemType; };
最后是类类型Class,这是最复杂的类型,因为类本身可以包含任意类型的成员变量,产生嵌套,每个成员变量既有名字,又有自己的类型信息。因此需要引入一个属性(也即成员变量)类型Property,会在后面介绍(注:之后本节提到的“属性”也都指成员变量)。Class声明如下:
1
2
3
4
5
6
7
8
9
10
11
12
13
14
15
16
class Class : public Type{ public : Class () : Type (TypeCategory::Class) {} const std::vector<std::shared_ptr<Property>> &GetProperties () const { return properties; } Class &AddProperty (const std::shared_ptr<Property> &prop) { properties.emplace_back (prop); return *this ; } private : std::vector<std::shared_ptr<Property>> properties; };
用vector维护所有属性的指针,是因为具体每种属性类型需要用到模板,这里使用指针实现多态,后面每个具体属性的模板类Property_Impl都继承Property,实现接口的统一。
现在,我们先将Property_Impl的具体定义搁置,来看看前面介绍的基础类型怎样在运行时注册。
类型注册
前面我们只是定义了类型的数据格式,却没有分配任何空间用于存放这些类型数据。容易想到使用一个哈希表(如std::unordered_map<std::string, const Type *>)来存放数据,同时实现了类型名到类型的映射,但是用字符串来操作类型不太方便。此处,我们希望实现的效果是针对每一个类型,有独自一块空间来存放该类型的信息,即每一个类型有唯一的实例来存放类型信息。
使用单例模式可以完美符合我们的需求。因此,对于每一个类型T,我们可以定义一个模板类TypeInfo<T>来存储该类型的信息。同时,这个模板类TypeInfo<T>还提供对外的注册接口,而又由于不同种类型的注册时提供的接口不同,需要将TypeInfo<T>进行拆分细化。可以定义多个模板类,FundamentalTypeInfo<T>,EnumTypeInfo<T>等,分别对应各大类别。
至于在哪里存储类型数据,一种容易想到的方法是在对应TypeInfo类中声明一个静态变量,并在类外定义,但这种方法的问题是,全局的静态变量的初始化顺序是不确定的,这可能导致一些可以自动注册的嵌套类型,其先于依赖的基础类型注册,例如std::vector<int>类型,如果在int类型之前注册,那么在确定类型名时,就无法正确得到int这一类型名。因此,一种更好的方式是使用函数内 的静态变量,在第一次调用该函数时,变量初始化,这样保证了嵌套类型在调用基础类型的函数获取类型信息时,对应基础类型一定已经注册好了。
接下来定义每种类型的TypeInfo模板类。
对于Fundamental类型,可以这样简单地写:
1
2
3
4
5
6
7
8
9
10
template <typename T>class FundamentalTypeInfo { public : static Fundamental &GetInfo () { static Fundamental info (fundamental_traits<T>::name, fundamental_traits<T>::kind) return info; } };
Fundamental类型都是自动注册的,我们需要根据类型T,得到类型名和对应枚举项,为此我们用fundamental_traits来获取。
traits (类型萃取)是C++模板相关的一个重要概念,可以代表一种从类型中提取信息的范式,后面还会详细介绍。这里我们通过模板的匹配机制,手动指定所有基础类型的枚举项和名字,以下为部分示例:
1
2
3
4
5
6
7
8
9
10
11
12
13
14
15
16
17
18
19
20
21
22
23
24
25
26
27
28
29
30
31
template <typename >struct fundamental_traits { static constexpr FundamentalKind kind = FundamentalKind::Unknown; static constexpr std::string name = "Unknown" ; }; template <>struct fundamental_traits <bool >{ static constexpr FundamentalKind kind = FundamentalKind::Bool; static constexpr std::string name = "Bool" ; }; template <>struct fundamental_traits <char >{ static constexpr FundamentalKind kind = FundamentalKind::Char; static constexpr std::string name = "Char" ; }; template <>struct fundamental_traits <int8_t >{ static constexpr FundamentalKind kind = FundamentalKind::Int8; static constexpr std::string name = "Int8" ; }; template <>struct fundamental_traits <int16_t >{ static constexpr FundamentalKind kind = FundamentalKind::Int16; static constexpr std::string name = "Int16" ; };
对于StringTypeInfo,更加简单,在String类型的构造函数里就完成了自动注册。
对于ListTypeInfo,需要先得到存储元素的类型信息,故该GetInfo的实现要放在实现获取任意类型信息的GetType之后。
1
2
3
4
5
6
7
8
9
10
template <typename T>class ListTypeInfo { public : static List &GetInfo () { static List info (GetType<typename list_traits<T>::ElemType>()) return info; } };
对于Enum和Class类型,它们是无法自动注册,必须要手动注册的,要额外提供注册的接口,例如对于Enum:
1
2
3
4
5
6
7
8
9
10
11
template <typename T>class EnumTypeInfo { public : static Enum &Register (const std::string &name) static Enum &GetInfo () { static Enum info; return info; } };
对于Class,声明如下:
1
2
3
4
5
6
7
8
9
10
11
12
13
14
15
template <typename T>class ClassTypeInfo : public Singleton<ClassTypeInfo<T>>{ public : static ClassTypeInfo &Register (const std::string &name) template <typename Ptr> static ClassTypeInfo &AddProperty (Ptr accessor, const std::string &name) static Class &GetInfo () { static Class info; return info; } };
在注册属性时为能够进行链式调用,将该类作为单例。Class类的添加属性的方法需要传入类成员指针,因为这样才能通过类对象来访问对应的成员,乍一看觉得难懂,举个例子就比较直观了,我们希望接口是这样的:
1 2 3 4 5 6 7 8 9 10 11 12 13 14 struct Person { int age; std::string name; }; int main () TypeInfo<Person, Class>::Instance () .AddProperty (&Person::age, "age" ) .AddProperty (&Person::name, "name" ); }
可以看到,其实&Person::age的类型就是类成员指针int Person::*,&Person::name的类型就是类成员指针std::string Person::*,有了这一个类型,通过后文的类型萃取 就可以同时获取类类型和成员类型了。
至此,我们完成了所有基础类型信息的存储和注册功能,可以实现反射系统的核心方法GetType了:
1
2
3
4
5
6
7
8
9
10
template <typename T>const Type *GetType () if constexpr (std::is_fundamental_v<T>) return &FundamentalTypeInfo<T>::GetInfo (); } else if constexpr (std::is_same_v<T, std::string>) { return &StringTypeInfo<T>::GetInfo (); } else if constexpr (std::is_enum_v<T>) { return &EnumTypeInfo<T>::GetInfo (); } else if constexpr (is_list_v<T>) { return &ListTypeInfo<T>::GetInfo (); } else if constexpr (std::is_class_v<T>) { return &ClassTypeInfo<T>::GetInfo (); } else return nullptr ; }
这段代码很简单,就是依次判断传入类型T属于哪种类型,返回对应的类型信息。
但这样还不够,因为获取类型信息时,必须要在模板参数中指定类型GetType<XXX>(),能否只传入类型名的字符串来获取类型信息呢?
答案是肯定的,为此,我们利用之前的想法,维护一个名为typeDict哈希表std::unordered_map<std::string, const Type *>,在注册新类型时,存入一个键值对即可,以Enum的注册为例:
1
2
3
4
5
6
7
8
template <typename T>Enum &EnumTypeInfo<T>::Register (const std::string &name) { Enum &info = GetInfo (); info.name = name; typeDict[info.name] = &info; return info; }
这样就可以实现按名字字符串查找的GetType:
1
2
3
4
5
6
7
8
const Type *GetType (const std::string &name) if (typeDict.find (name) != typeDict.end ()) { return typeDict[name]; } return nullptr ; }
类型萃取
在实现Property之前,需要一点前置知识,即模板元编程中的类型萃取 。
我们希望通过一个类成员指针类型来“萃取”出其中父类和成员变量各自的类型,比如通过类型int Person::*得到父类Person和变量类型int,该怎么做呢?
让我们先看一个简单的例子,给一个指针类型T *,要得到去除指针后的类型,我们可以这么写:
1 2 3 4 5 6 7 8 9 10 11 12 13 14 template <typename >struct remove_pointer ;template <typename T>struct remove_pointer <T*> { using type = T; }; using raw_type = remove_pointer<int *>::type;
我们利用模板的匹配机制,匹配优先级:全特化>偏特化>通用模板。在偏特化模板中,我们指定要匹配带指针的类型,然后就可以在模板类中对匹配到的类型进行操作了。而要进行偏特化就首先要有通用模板,因此切记不要忘了先声明一个通用模板。
同理,匹配类成员指针也是类似的思路:
1
2
3
4
5
6
7
8
9
10
11
12
13
14
template <typename >struct property_traits ;template <typename Class_, typename Value_> struct property_traits <Value_ Class_::*> { using ClassType = Class_; using ValueType = Value_; }; using ClassType = property_traits<int Person::*>::ClassType;using ValueType = property_traits<int Person::*>::ValueType;
属性类型实现
至此,我们终于可以实现Property和Property_Impl了。
基类Property,由于没有类成员指针的信息,还无法存放自身的类型信息,只能存自身所属类的类型信息。故定义一个虚函数GetTypeInfo在子类实现。
1
2
3
4
5
6
7
8
9
10
11
12
13
14
15
class Property : public Type{ public : Property (const std::string &name, const Class *owner) : Type (name, TypeCategory::Property), owner (owner) {} ~Property () = default ; virtual const Type *GetTypeInfo () const 0 ; const Class *GetOwner () const return owner; } private : const Class *owner; const Type *info; };
子类Property_Impl,用类型萃取得到所属类的类型信息,调用了GetType,所以放在这里实现。
1 2 3 4 5 6 7 8 9 10 11 12 13 14 15 template <typename Ptr>class Property_Impl : public Property{ public : Property_Impl (const std::string &name, const Class *owner, Ptr accessor) : Property (name, owner), accessor (accessor), info (GetType<typename property_traits<Ptr>::ValueType>()) virtual const Type *GetTypeInfo () const override return info; }; private : Ptr accessor = nullptr ; const Type *info; };
紧接着是属性类型对应的TypeInfo:
1
2
3
4
5
6
7
8
9
10
11
12
13
14
15
template <typename T>class PropertyTypeInfo { public : static PropertyTypeInfo &Register (const std::string &name, T accessor) { using ClassType = property_traits<T>::ClassType; info = std::make_shared<Property_Impl<T>>(name, &ClassTypeInfo<ClassType>::GetInfo (), accessor); return Singleton<PropertyTypeInfo<T>>::Instance (); } static std::shared_ptr<Property> GetInfo () const return info; } private : static std::shared_ptr<Property> info; };
最后在TypeInfo<T, Class>类外实现添加属性的接口:
1
2
3
4
5
6
7
8
template <typename T>template <typename Ptr>ClassTypeInfo<T> &ClassTypeInfo<T>::AddProperty (Ptr accessor, const std::string &name) { Class &info = GetInfo (); info.AddProperty (PropertyTypeInfo<Ptr>::Register (name, accessor).GetInfo ()); return Singleton<ClassTypeInfo<T>>::Instance (); }
这样我们就实现了任意类型信息的注册和查询。(当然还有其他类型需要完善,比如指针类型等,这些可由读者自行实现。)可以写一个方法来简化注册:
1
2
3
4
5
6
template <typename T>auto &Register (const std::string &name) if constexpr (std::is_enum_v<T>) return EnumTypeInfo<T>::Register (name); } else if constexpr (std::is_class_v<T>) { return ClassTypeInfo<T>::Register (name); } }
要指出的是,对于嵌套类,其中每一个类都要单独注册,如:
1
2
3
4
5
6
7
8
9
10
11
12
13
14
15
16
17
18
19
struct Person { int age; std::string name; struct Address { std::string city; int zipCode; }; Address address; }; Register <Person>("Person" ).AddProperty (&Person::age, "age" ) .AddProperty (&Person::name, "name" ) .AddProperty (&Person::address,"address" ); Register <Person::Address>("Person::Address" ) .AddProperty (&Person::Address::city, "city" ) .AddProperty (&Person::Address::zipCode, "zipCode" );
由反射信息访问实例
反射系统还没完成,因为我们有了类型信息,却还没法应用到实例上从而修改或者获取实例的值。我们希望应用到实例的方法尽可能通用,无关具体类型,这时侯对变量的类型擦除 就十分有用了。
由于是C++,完全可以用裸指针void *实现类型擦除,但安全性没有保障;C++17提供了std::any来实现安全的类型擦除。
std::any
std::any是一个可以可以存放任意数据类型的容器,可以通过std::any_cast<T>(const std::any&)转换成具体类型。特别要注意的是,它默认存储的都是值类型,不能存引用(为了确保类型安全)。但是我们希望得到对原实例属性的引用,这样修改时,修改的才是原实例而不是其拷贝。
解决这一问题有两种方法,一是用std::ref()让std::any强制存一个“引用”类型,二是让std::any存储指针类型,相当于void *的安全加强版。在实现中,两种方法只有个别差异,笔者偏向使用第一种方法。
std::ref相关的基本用法如下:
1
2
3
4
Person p; std::any obj = std::ref (p); Person& ref_p = std::any_cast<std::reference_wrapper<Person>>(obj).get ();
访问实例属性
访问实例最重要的是访问类中的成员,我们先以第一种方法为例来实现。需求是:由Property类型信息和一个存储了所属类的实例的std::any对象,获取一个存储了该实例中这个属性的实际值的std::any对象,且这里的std::any存的都是引用。
为此我们在Property基类中添加一个虚函数Call来满足这个需求:
1
2
3
4
5
6
7
class Property : public Type{ public : virtual std::any Call (const std::any &) const 0 ; };
再在Property_Impl中具体实现:
1
2
3
4
5
6
7
8
9
10
11
12
13
14
15
16
17
18
template <typename Ptr>class Property_Impl : public Property{ public : std::any Call (const std::any &a) const override { using ClassType = property_traits<Ptr>::ClassType; if (GetType <ClassType>() != GetOwner ()) throw std::runtime_error ("Type mismatch" ); auto &obj = std::any_cast<std::reference_wrapper<ClassType>>(a).get (); return std::ref (obj.*accessor); } private : Ptr accessor; };
因为accessor是类成员指针,obj是类的实例,通过obj.*accessor这种方式就可以获取对应的类成员。
使用第二种方式,std::any存指针的实现类似:
1
2
3
4
5
6
7
8
9
10
11
12
13
14
15
16
17
template <typename Ptr>class Property_Impl : public Property{ public : std::any Call (const std::any &a) const override { using ClassType = property_traits<Ptr>::ClassType; if (GetType <ClassType>() != GetOwner ()) throw std::runtime_error ("Type mismatch" ); auto ptr = std::any_cast <ClassType *>(a); return &(ptr->*accessor); } private : Ptr accessor; };
实现自己的any
笔者学习过程中,一开始没有用std::any,而是跟着教程实现了一个自己的Any类,但由于耦合度高导致依赖上的问题,使得代码较为复杂,遂采用std::any实现,但也窥见了std::any底层实现的一些细节。这里只给出思路,不再将自己实现的Any与反射系统结合,仅作学习记录。
1 2 3 4 5 6 7 8 9 10 11 12 13 14 15 16 17 18 19 20 21 22 23 24 25 26 27 28 29 30 31 32 33 34 35 36 37 38 39 40 41 42 43 44 45 46 47 48 49 50 51 52 53 54 55 56 57 58 59 60 61 62 63 64 65 66 67 68 69 70 71 72 73 74 75 76 77 78 79 80 81 82 83 84 85 86 87 88 89 90 91 92 93 94 95 96 97 98 99 100 101 102 103 104 105 106 107 108 109 110 111 112 113 114 115 116 117 118 119 120 121 122 123 124 125 126 127 128 129 130 131 132 133 134 135 136 137 138 139 140 141 142 143 144 145 146 147 148 149 150 151 152 153 154 155 156 157 158 159 160 161 162 void swap (Any &a, Any &b) class Any final { public : enum class StorageType { Empty, Copy, Ref, ConstRef }; struct Operations { std::function<Any(const Any &)> copy; std::function<Any(Any &&)> move; std::function<void (Any &)> release; }; Any () = default ; Any (const Type *typeinfo, void *payload, StorageType storageType, Operations ops) : typeinfo (typeinfo), payload (payload), storageType (storageType), ops (ops) {} Any (const Any &other) { if (ops.copy) { auto new_any = ops.copy (other); payload = new_any.payload; new_any.payload = nullptr ; new_any.ops.release = nullptr ; } else { storageType = StorageType::Empty; typeinfo = nullptr ; } } Any (Any &&other) noexcept : Any () { swap (other, *this ); } Any &operator =(Any other) { swap (other, *this ); return *this ; } ~Any () { if (ops.release && storageType == StorageType::Copy) { ops.release (*this ); } } const Type *typeinfo; void *payload; StorageType storageType = StorageType::Empty; Operations ops; }; void swap (Any &a, Any &b) using std::swap; swap (a.ops, b.ops); swap (a.payload, b.payload); swap (a.storageType, b.storageType); swap (a.typeinfo, b.typeinfo); } template <typename T>struct operations_traits { static Any Copy (const Any &elem) { Any ret_value; ret_value.payload = new std::remove_reference_t <T> {*static_cast <std::remove_reference_t <T> *>(elem.payload)}; ret_value.typeinfo = elem.typeinfo; ret_value.storageType = Any::StorageType::Copy; ret_value.ops = elem.ops; return ret_value; } static Any Move (Any &&elem) { Any ret_value; ret_value.payload = new std::remove_reference_t <T> {std::move (*static_cast <std::remove_reference_t <T> *>(elem.payload))}; ret_value.typeinfo = elem.typeinfo; ret_value.storageType = Any::StorageType::Copy; elem.storageType = Any::StorageType::Empty; ret_value.ops = elem.ops; return ret_value; } static void Release (Any &elem) { delete static_cast <std::remove_reference_t <T> *>(elem.payload); elem.payload = nullptr ; elem.storageType = Any::StorageType::Empty; elem.typeinfo = nullptr ; } static const Any::Operations &GetOperations () { using traits = operations_traits<T>; static Any::Operations operations = {traits::Copy, traits::Move, traits::Release}; return operations; } }; template <typename T>Any MakeCopy (const T &elem) Any ret_value; ret_value.payload = new T{elem}; ret_value.typeinfo = GetType <T>(); ret_value.storageType = Any::StorageType::Copy; if constexpr (std::is_copy_constructible_v<T>) if constexpr (std::is_move_constructible_v<T>) if constexpr (std::is_destructible_v<T>) return ret_value; } template <typename T>Any MakeMove (T &&elem) Any ret_value; ret_value.payload = new std::remove_reference_t <T>{std::move (elem)}; ret_value.typeinfo = GetType <T>(); ret_value.storageType = Any::StorageType::Copy; if constexpr (std::is_copy_constructible_v<T>) if constexpr (std::is_move_constructible_v<T>) if constexpr (std::is_destructible_v<T>) return ret_value; } template <typename T>Any MakeRef (const T &elem) Any ret_value; ret_value.payload = &elem; ret_value.typeinfo = GetType <T>(); ret_value.storageType = Any::StorageType::Ref; if constexpr (std::is_copy_constructible_v<T>) if constexpr (std::is_move_constructible_v<T>) if constexpr (std::is_destructible_v<T>) return ret_value; } template <typename T>Any MakeConstRef (const T &elem) Any ret_value; ret_value.payload = const_cast <T *>(&elem); ret_value.typeinfo = GetType <T>(); ret_value.storageType = Any::StorageType::ConstRef; if constexpr (std::is_copy_constructible_v<T>) if constexpr (std::is_move_constructible_v<T>) if constexpr (std::is_destructible_v<T>) return ret_value; } template <typename T>T *AnyCast (const Any &elem) if (elem.typeinfo == GetType <T>()) { return static_cast <T *>(elem.payload); } else return nullptr ; }
关键在于保存每个类型怎样进行拷贝、移动、和释放等,以及如何进行Any对象之间的拷贝、移动,Any对象的析构,从而保证测试不会出现内存泄漏的问题。
对std::any的包装
std::any原生无法直接接收引用,我们可以进行一层包装,从而免去调用std::ref和解引用的过程。而这样包装的Any又无法接收字面量了,所幸在反射的应用场景中,Any并不用来存储字面量。
1
2
3
4
5
6
7
8
9
10
11
12
13
14
15
16
17
18
19
20
21
22
23
24
25
26
27
28
29
30
31
32
33
34
35
36
37
38
39
40
41
class Any { public : template <typename T> requires (!std::is_same_v<T, Any>) Any (T &ref) : any_ (std::ref (ref)) {} template <typename T> requires (!std::is_same_v<T, Any>) Any (const T &ref) : any_ (std::cref (ref)) {} template <typename T> requires (!std::is_same_v<T, Any>) Any (T *ptr) : any_ (ptr) {} template <typename T> requires (!std::is_same_v<T, Any>) Any (const T *ptr) : any_ (ptr) {} Any (const Any &other) = default ; Any (Any &&other) = default ; template <typename T> T &As () { if (T **ptr = std::any_cast <T *>(&any_)) return **ptr; if (auto ref = std::any_cast<std::reference_wrapper<T>>(&any_)) return ref->get (); throw std::bad_any_cast (); } template <typename T> const T &As () const { if (const T *const *ptr = std::any_cast <const T *>(&any_)) return **ptr; if (const T *const *ptr = std::any_cast <T *>(&any_)) return **ptr; if (auto ref = std::any_cast<std::reference_wrapper<const T>>(&any_)) return ref->get (); if (auto ref = std::any_cast<std::reference_wrapper<T>>(&any_)) return ref->get (); throw std::bad_any_cast (); } private : std::any any_; };
该自定义Any类同时支持了从指针或引用构造。值得一提的是,std::any_cast<T>(const any&)在类型转换失败时,会直接抛出bad_any_cast异常,若不想处理异常,可以选择重载版本std::any_cast<T>(const any*),传入目标any的地址,该重载版本在类型转换失败时会返回nullptr,简化处理,上面的Any正是这样实现的。
之后,我们就可以简化一部分代码了。
1
2
3
4
5
6
7
8
9
10
11
12
13
14
15
16
17
18
19
20
21
template <typename Ptr>Any Property_Impl<Ptr>::Call (Any &instance) const { using ClassType = property_traits<Ptr>::ClassType; if (GetType <ClassType>() != GetOwner ()) throw std::runtime_error ("Type mismatch" ); auto &obj = instance.As <ClassType>(); auto &val = obj.*accessor; return val; } template <typename Ptr>Any Property_Impl<Ptr>::Call (const Any &instance) const { using ClassType = property_traits<Ptr>::ClassType; if (GetType <ClassType>() != GetOwner ()) throw std::runtime_error ("Type mismatch" ); auto &obj = instance.As <ClassType>(); const auto &val = obj.*accessor; return val; }
不止此处,在由列表类型得到实例存储的元素,以及由枚举类型修改枚举值时,都需要用到Any,同时这些方法也要用到实际类型,因此我们在类中存储函数指针,并在模板类中实现具体方法。
1
2
3
4
5
6
7
8
9
10
11
12
13
14
15
16
17
18
19
20
21
22
23
24
25
26
27
28
29
30
31
32
33
34
35
36
37
38
39
40
41
42
43
44
45
46
47
48
49
50
51
52
53
54
55
56
struct ListFunctions { std::function<Any(size_t , Any &)> getElemFunc; std::function<const Any(size_t , const Any &)> getElemConstFunc; std::function<Any(Any &)> getBackFunc; std::function<const Any(const Any &)> getBackConstFunc; std::function<size_t (const Any &)> getSizeFunc; }; template <typename ElemType>struct ListOperations { static Any GetElem (size_t index, Any &instance) { auto &lst = instance.As<std::vector<ElemType>>(); return lst[index]; } static const Any GetElemConst (size_t index, const Any &instance) { auto &lst = instance.As<std::vector<ElemType>>(); return lst[index]; } static Any GetBack (Any &instance) { auto &lst = instance.As<std::vector<ElemType>>(); return lst.back (); } static const Any GetBackConst (const Any &instance) { auto &lst = instance.As<std::vector<ElemType>>(); return lst.back (); } static size_t GetSize (const Any &instance) { auto &lst = instance.As<std::vector<ElemType>>(); return lst.size (); } }; class List : public Type{ public : List (const Type *elemType, const ListFunctions &listFuncs); const Type *GetElemType () const return elemType; } Any GetElem (size_t index, Any &) const ; const Any GetElem (size_t index, const Any &) const Any GetBack (Any &) const ; const Any GetBack (const Any &) const size_t GetSize (const Any &) const private : const Type *elemType; const ListFunctions listFunctions; };
自动注册时:
1
2
3
4
5
6
7
8
9
10
11
12
13
template <typename T>ListFunctions GetListFunctions () using ListOps = ListOperations<T>; return ListFunctions{ListOps::GetElem, ListOps::GetBack, ListOps::GetSize}; } template <typename T>List &ListTypeInfo<T>::GetInfo () { static List info (GetType<typename list_traits<T>::ElemType>(), GetListFunctions<typename list_traits<T>::ElemType>()) return info; }
代码生成
动态反射系统要求我们对要反射的类型逐个注册。在游戏引擎中,当要反射的类型很多时,手动写注册代码不仅费时费力,还容易出错,有没有方法能自动生成这部分注册代码呢?我们可以设计一个自动解析源码,并生成在反射系统中注册要的代码的系统,集成到引擎工程中。
要解析源码,获取其中有哪些类,哪些变量要反射,我们需要用到Clang ,除了作为编译器之外,Clang还可以作为一个库,让开发者在程序中运用编译器的功能解决问题。比如解析代码的功能就可以通过Clang获取C++源码的抽象语法树 (AST)来实现。
如果读者使用vscode,可以安装clangd插件,选中代码后右键,可以查看该部分代码的AST。Person类:
1
2
3
4
5
6
7
8
9
10
11
struct Person { int age; std::string name; struct Address { std::string city; int zipCode; }; Address address; };
得到的AST结构如下:
使用Clang获取AST
网上的很多教程使用的是Clang的C语言接口libclang,或是其python绑定。这两种方法使用clang的接口比较简单。但是笔者在尝试C语言的libclang接口时,解析源码遇到了宏定义展开失效的问题(具体原因不明) ,故采用clang的C++接口,这套接口相比之下更加复杂,功能性也更全面。(后续用C语言的libclang接口也成功了,更加简洁,后面略加补充)
要在项目中使用C++的clang接口,首先要安装llvm和clang库,接着在CmakeLists中:
1
2
3
4
5
6
7
8
9
10
11
12
13
14
15
find_package (Clang REQUIRED CONFIG)find_package (LLVM REQUIRED CONFIG)target_include_directories (YourProject PUBLIC ${LLVM_INCLUDE_DIRS} ${CLANG_INCLUDE_DIRS} ) target_link_libraries (YourProject PUBLIC clangAST clangBasic clangFrontend clangSerialization clangTooling )
接着就可以使用了。
使用clang解析一个文件的源码,大体流程如下:
1 2 3 4 5 6 7 8 9 10 11 12 13 14 15 16 17 18 19 20 21 22 23 24 25 26 27 28 29 30 31 32 33 34 35 36 37 38 39 40 41 42 43 44 45 46 47 48 49 50 51 52 53 54 55 56 57 58 59 60 61 62 #include "clang/Tooling/CommonOptionsParser.h" #include "llvm/Support/CommandLine.h" #include "clang/AST/ASTConsumer.h" #include "clang/AST/RecursiveASTVisitor.h" #include "clang/Frontend/CompilerInstance.h" #include "clang/Frontend/FrontendAction.h" #include "clang/Tooling/Tooling.h" #include "llvm/Support/raw_ostream.h" class IgnoreDiagnosticConsumer : public clang::DiagnosticConsumer{ public : void HandleDiagnostic (clang::DiagnosticsEngine::Level DiagLevel, const clang::Diagnostic &Info) override }; class ParserASTConsumer : public ASTConsumer{ public : void HandleTranslationUnit (ASTContext &Context) override }; class FrontendAction : public ASTFrontendAction{ public : std::unique_ptr<ASTConsumer> CreateASTConsumer (CompilerInstance &CI, StringRef file) override { CI.getFileManager ().clearStatCache (); CI.getDiagnostics ().setClient (new IgnoreDiagnosticConsumer, true ); CI.getDiagnostics ().setSuppressAllDiagnostics (true ); CI.getDiagnostics ().setIgnoreAllWarnings (true ); return std::make_unique <ParserASTConsumer>(); } }; using namespace clang::tooling;using namespace clang;int main () std::vector<std::string> extraArgs = {}; const std::string filename = ; llvm::ErrorOr<std::unique_ptr<llvm::MemoryBuffer>> FileOrErr = llvm::MemoryBuffer::getFile (filename); if (std::error_code EC = FileOrErr.getError ()) { llvm::errs () << "Error reading file: " << EC.message () << "\n" ; return 1 ; } tooling::runToolOnCodeWithArgs ( std::make_unique <FrontendAction>(), (*FileOrErr)->getBuffer (), extraArgs, filename.c_str () ); return 0 ; }
我们可以在HandleTranslationUnit中遍历AST,获取想要的信息。
我们关注的是所有类和枚举的声明,因此要在AST中找Decl节点,通过dyn_cast进行父类向子类的转换,dyn_cast用法与C++的dynamic_cast相同。在HandleTranslationUnit中,提供了一个ASTContext &content的参数作为上下文,通过Context.getTranslationUnitDecl()即可获取当前翻译单元的根节点,接下来我们需要手动来写遍历AST的函数。(虽然clang提供了便捷的RecursiveASTVisitor来遍历AST,但是它不会保存根节点到路径上其他节点的信息,无法满足我们的需求)
遍历AST
首先可以封装一个指针类Cursor用来简化代码,对于每个Decl节点,我们需要查询的信息有:节点类型,名称(DisplayName),节点属性(Attribute),在源码的位置,以及其子节点。具体定义如下:
1
2
3
4
5
6
7
8
9
10
11
12
13
14
15
16
17
18
19
20
21
22
23
24
25
26
27
28
29
30
31
32
33
34
35
36
37
38
39
40
41
class Cursor { public : Cursor (const Decl *) : handle (handle) {} Decl::Kind GetKind () const { return handle->getKind (); } std::string GetDisplayName () const { if (const auto *namedDecl = dyn_cast <NamedDecl>(handle)) { return namedDecl->getNameAsString (); } return "" ; } std::vector<Cursor> GetChildren () const { std::vector<Cursor> children; if (auto *parent = dyn_cast <DeclContext>(handle)) { for (Decl *child : parent->decls ()) { if (child->isImplicit ()) continue ; children.push_back (child); } } return children; } const clang::AnnotateAttr *GetAnnotateAttr () const { return handle->getAttr <AnnotateAttr>(); } SourceLocation GetLocation () const { return handle->getLocation (); } private : const Decl *handle; };
接着定义存储了查询到的信息的结构,以Node作为基类,派生出NamespaceNode,ClassNode,EnumNode,FieldNode子类,要保存节点属性,类型,名称:
1
2
3
4
5
6
7
8
9
10
11
12
13
14
15
16
17
18
19
20
21
22
23
24
25
26
27
28
29
30
31
32
33
34
35
36
37
38
39
40
41
42
43
44
45
46
47
48
49
50
51
52
53
54
55
56
57
58
59
60
61
62
63
64
65
66
struct Attribute { bool need_reflect; bool force_no_reflect; }; class Node { public : enum class Type { Unknown, Namespace, Field, Class, Enum }; Node () = default ; Node (Type type) : type (type) {} Node (Type type, const std::string &name) : type (type), name (name) {} virtual ~Node () { for (auto child : children) { delete child; } children.clear (); } Type type; std::string name; std::vector<Node *> children; Attribute attr = {false , false }; }; class NamespaceNode : public Node{ public : NamespaceNode () : Node (Node::Type::Namespace) {} NamespaceNode (const std::string &name) : Node (Node::Type::Namespace, name) {} }; class FieldNode : public Node{ public : FieldNode () : Node (Node::Type::Field) {} FieldNode (const std::string &name) : Node (Node::Type::Field, name) {} }; class ClassNode : public Node{ public : ClassNode () : Node (Node::Type::Class) {} ClassNode (const std::string &name) : Node (Node::Type::Class, name) {} ~ClassNode () { for (auto field : fields) { delete field; } fields.clear (); } std::vector<FieldNode *> fields; }; class EnumNode : public Node{ public : EnumNode () : Node (Node::Type::Enum) {} EnumNode (const std::string &name) : Node (Node::Type::Enum, name) {} std::vector<std::string> items; };
接下来我们就可以用深度优先搜索遍历AST了,在ParserASTConsumer中定义一个RecurseVisit函数:
1
2
3
4
5
6
7
8
9
10
11
12
13
14
15
16
17
18
19
20
21
22
23
24
25
26
27
28
29
30
31
32
33
34
35
36
37
38
39
40
41
42
43
44
45
46
47
48
49
50
51
52
53
54
55
56
57
58
59
60
61
62
63
64
65
66
67
68
69
70
71
72
73
74
75
76
class ParserASTConsumer : public ASTConsumer{ static Node *root; static ASTContext *context; void RecurseVisit (const Cursor &cursor, Node *parent) { if (Parser::ParserASTConsumer::context->getSourceManager ().isInSystemHeader (cursor.GetLocation ())) { return ; } auto kind = cursor.GetKind (); if (kind == Decl::Kind::TranslationUnit) { for (const auto &child : cursor.GetChildren ()) { RecurseVisit (child, parent); } } if (kind == Decl::Kind::Namespace) { NamespaceNode *node = new NamespaceNode (cursor.GetDisplayName ()); for (const auto &child : cursor.GetChildren ()) { RecurseVisit (child, node); } if (node->children.empty ()) { delete node; } else { parent->children.push_back (node); } } if (kind == Decl::Kind::CXXRecord) { auto attr = ParseAttributes (cursor); attr = TransformAttributesByParent (attr, parent->attr); if (attr.need_reflect) { ClassNode *node = new ClassNode (cursor.GetDisplayName ()); node->attr = attr; for (const auto &child : cursor.GetChildren ()) { RecurseVisit (child, node); } if (node->children.empty () && node->fields.empty ()) { delete node; } else { parent->children.push_back (node); } } } if (kind == Decl::Kind::Enum) { auto attr = ParseAttributes (cursor); attr = TransformAttributesByParent (attr, parent->attr); if (attr.need_reflect) { EnumNode *node = new EnumNode (cursor.GetDisplayName ()); node->attr = attr; ParseEnumNode (cursor, node); if (node->items.empty ()) { delete node; } else { parent->children.push_back (node); } } } if (kind == Decl::Kind::Field) { if (parent->type == Node::Type::Class) { auto attr = ParseAttributes (cursor); attr = TransformAttributesByParent (attr, parent->attr); if (attr.need_reflect) { FieldNode *node = new FieldNode (cursor.GetDisplayName ()); node->attr = attr; auto current_class = dynamic_cast <ClassNode *>(parent); current_class->fields.push_back (node); } } } } };
其中有很多实现细节,有些不再赘述。
libclang实现的补充
用C的libclang接口,只需要更改Cursor类和部分Parser类就行。
1 2 3 4 5 6 7 8 9 10 11 12 13 14 15 16 17 18 19 20 21 22 23 24 25 26 27 28 29 30 31 32 33 34 35 36 37 38 39 40 41 42 43 44 45 46 47 48 49 50 51 52 53 54 55 56 57 58 59 60 61 62 63 64 65 66 67 68 69 70 71 72 73 74 75 76 77 78 79 80 81 82 83 84 85 86 87 88 #include <clang-c/Index.h> static std::string ToString (const CXString &str) auto cstr = clang_getCString (str); std::string res = cstr; clang_disposeString (str); return res; } class Cursor { public : Cursor (const CXCursor &handle); CXCursorKind GetKind () const { return handle.kind; } std::string GetSpelling () const { return ToString (clang_getCursorSpelling (handle)); } std::vector<Cursor> GetChildren () const { std::vector<Cursor> children; auto visitor = [](CXCursor cursor, CXCursor parent, CXClientData data) { auto container = static_cast <std::vector<Cursor> *>(data); container->emplace_back (cursor); if (cursor.kind == CXCursor_LastPreprocessing) return CXChildVisit_Break; return CXChildVisit_Continue; }; clang_visitChildren (handle, visitor, &children); return children; } CXSourceLocation GetLocation () const { return clang_getCursorLocation (handle); } std::string GetAnnotateAttr () const { std::string res{}; auto visitor = [](CXCursor cursor, CXCursor parent, CXClientData data) { auto str = static_cast <std::string *>(data); if (cursor.kind == CXCursor_AnnotateAttr) { *str = clang_getCString (clang_getCursorSpelling (cursor)); return CXChildVisit_Break; } if (cursor.kind == CXCursor_LastPreprocessing) return CXChildVisit_Break; return CXChildVisit_Continue; }; clang_visitChildren (handle, visitor, &res); return res; } private : CXCursor handle; }; Node *Parser::ParseFile (const std::string &filename) CXIndex index = clang_createIndex (0 , 0 ); CXTranslationUnit unit = clang_parseTranslationUnit ( index, filename.c_str (), extraArgs.data (), extraArgs.size (), NULL , 0 , CXTranslationUnit_None); CXCursor rootCursor = clang_getTranslationUnitCursor (unit); Node *root = new Node; RecurseVisit (rootCursor, root); return root; }
接下来具体介绍一下与节点属性相关的部分。
解析属性
如何判断一个类或枚举要不要反射呢?我们希望通过在源码中添加简单的标记来告诉解析程序。而C++中有属性 (Attribute)这个概念,是专门用来告诉编译器一些信息的,用[[ ... ]]来表示。而我们要告诉编译器的不是内置的信息,而是自定义的信息,这时可以用到匿名属性(Annotate Attribute),对于clang编译器,我们可以使用[[clang::annotate( "..." )]]来表达信息,Clang可以获取双引号内的字符信息。
因此我们可以在要反射的类或枚举名称前加一个匿名属性来标记。例如:
1
2
3
4
class [[clang::annotate ("reflect" )]] Person{ };
如果在需要反射的类内,又有不需要反射的属性,则在属性前面同样加上一个匿名属性,将字符串内容改为noreflect,表示不参与反射。
但这样写起来还是麻烦,我们可以用宏定义来简化:
1 2 3 4 5 6 7 #ifdef __REFLECTION_ENABLE__ #define refl clang::annotate("reflect" ) #define norefl clang::annotate("noreflect" ) #else #define refl #define norefl #endif
这样,在解析源码的工程中,我们给clang传递一个-D__REFLECTION_ENABLE__参数,表示加上这个宏定义,这样refl会被替换为匿名属性;而在引擎工程中,没有定义__REFLECTION_ENABLE__宏,因此refl会被删除,编译器会忽略空的属性。之后我们就可以优雅地写出这样的代码:
1
2
3
4
5
class [[refl]] Person{ [[norefl]] int age; std::string name; };
在解析时,我们定义ParseAttributes函数来解析匿名属性中的字符串,定义TransformAttributesByParent来使父节点的属性参与其中。
1 2 3 4 5 6 7 8 9 10 11 12 13 14 15 16 17 18 19 20 21 22 23 24 25 26 27 28 29 30 Attribute ParseAttributes (const Cursor &cursor) if (const auto *attr = cursor.GetAnnotateAttr ()) { const auto &spelling = attr->getAnnotation ().str (); if (spelling == "reflect" ) return {true , false }; else if (spelling == "noreflect" ) return {false , true }; else return {false , false }; } return {false , false }; } Attribute TransformAttributesByParent (Attribute node_attr, Attribute parent_attr) if (parent_attr.need_reflect) { if (node_attr.force_no_reflect) return {false , true }; else return {true , false }; } else if (parent_attr.force_no_reflect) { if (node_attr.need_reflect) return {true , false }; else return {false , true }; } else { return node_attr; } }
Mustache生成代码
有了需要反射的信息,最后要做的就是按一个固定的格式填这些信息。我们可以使用Mustache模板引擎 来简便地生成代码,只要写一个规定格式的模板文件,然后在程序中设置模板中的变量值,Mustache就可以渲染出目标文件。
Mustache是一个纯头文件的库,只需要在CmakeLists中添加包含路径,#include <mustache.hpp>就可以使用。
我们将渲染的模板如下:
注册一个类:
1
2
3
4
5
::Register<{{class_name}}>("{{class_register_name}}") {{#properties}} .AddProperty(&{{property_name}}, "{{property_register_name}}") {{/properties}} ;
注册一个枚举:
1
2
3
4
5
::Register<{{enum_name}}>("{{enum_register_name}}") {{#items}} .Add({{item_name}}, "{{item_register_name}}") {{/items}} ;
一个文件中所有类和枚举的注册(.h):
1
2
3
4
5
6
7
8
9
10
11
12
13
14
15
16
17
#pragma once #include "refl.h" // 反射系统中Register方法所在的头文件 #include "{{parsed_filename}}" namespace ReflectionGenerate { inline void Register_{{refl_func_name}}_ReflInfo() { {{#enums}} {{{enum}}} {{/enums}} {{#classes}} {{{class}}} {{/classes}} } }
所有文件的注册方法整合成一个注册方法,所在的头文件:
1
2
3
4
5
6
7
#pragma once namespace ReflectionGenerate { void RegisterReflectionInfo(); }
所在的源文件:
1
2
3
4
5
6
7
8
9
10
11
12
13
14
15
#include "{{header_file}}" {{#refl_header_files}} #include "{{refl_header_file}}" // 所有单个文件生成的注册方法的头文件 {{/refl_header_files}} namespace ReflectionGenerate { void RegisterReflectionInfo() { {{#func_calls}} {{func_call}}(); {{/func_calls}} } }
接下来,将从AST中获取的信息整理成一定格式。
1 2 3 4 5 6 7 8 9 10 11 12 13 14 15 16 17 18 19 20 21 22 23 24 25 26 27 28 29 30 31 32 33 34 35 36 37 38 39 40 41 42 struct ClassMustacheFormat { std::string class_name; std::string class_register_name; struct PropertyMustacheFormat { std::string property_name; std::string property_register_name; }; std::vector<PropertyMustacheFormat> properties; }; struct EnumMustacheFormat { std::string enum_name; std::string enum_register_name; struct ItemMustacheFormat { std::string item_name; std::string item_register_name; }; std::vector<ItemMustacheFormat> items; }; struct MustacheFormat { std::string parsed_filename; std::string refl_func_name; std::vector<std::string> class_codes; std::vector<std::string> enum_codes; }; struct ImplMustacheFormat { std::string header_file; std::vector<std::string> refl_header_files; std::vector<std::string> func_calls; };
从节点信息整理生成反射代码:
1
2
3
4
5
6
7
8
9
10
11
12
13
14
15
16
17
18
19
20
21
22
23
24
25
26
27
28
29
30
31
32
33
34
35
36
37
38
39
40
41
42
43
44
45
46
47
48
49
50
51
52
53
54
55
56
57
58
59
60
std::string GenerateCode (const std::string &filename, const std::string &func_name, Node *node) MustacheFormat format; format.parsed_filename = filename; format.refl_func_name = func_name; for (auto child : node->children) { GenerateCodeRecursive ("" , child, format); } return MustacheManager::Instance ().RenderCode (format); } void GenerateCodeRecursive (const std::string &prefix, Node *node, MustacheFormat &format) if (node->type == Node::Type::Enum) { auto code = GenerateEnumCode (prefix, node); format.enum_codes.push_back (code); } if (node->type == Node::Type::Class) { auto code = GenerateClassCode (prefix, node); format.class_codes.push_back (code); } auto new_prefix = prefix + "::" + node->name; for (auto child : node->children) { GenerateCodeRecursive (new_prefix, child, format); } } std::string GenerateEnumCode (const std::string &prefix, Node *node) auto enum_name_with_prefix = prefix + "::" + node->name; EnumMustacheFormat format; format.enum_name = enum_name_with_prefix; format.enum_register_name = node->name; auto enum_node = dynamic_cast <EnumNode *>(node); for (auto item : enum_node->items) { auto item_name = enum_name_with_prefix + "::" + item; auto item_register_name = item; format.items.push_back ({item_name, item_register_name}); } return MustacheManager::Instance ().RenderEnumNode (format); } std::string GenerateClassCode (const std::string &prefix, Node *node) auto class_name_with_prefix = prefix + "::" + node->name; ClassMustacheFormat format; format.class_name = class_name_with_prefix; format.class_register_name = node->name; auto class_node = dynamic_cast <ClassNode *>(node); for (auto field : class_node->fields) { if (field->attr.need_reflect) { auto field_name = class_name_with_prefix + "::" + field->name; auto field_register_name = field->name; format.properties.push_back ({field_name, field_register_name}); } } return MustacheManager::Instance ().RenderClassNode (format); }
MustacheManager主要负责读取模板文件,以及调用mustache的API来生成代码。Mustache的API较简单,可以查看github仓库的README来了解。
整合
之前提到,我们调用clang时可以指定编译器的额外参数,具体的参数如下:
1
2
3
4
5
6
7
8
9
std::vector<std::string> extraArgs = { "-x" , "c++" , "-std=c++20" , "-w" , "-MG" , "-M" , "-DNDEBUG" , "-D__clang__" , "-ferror-limit=0" , "-Wno-everything" , "-D__REFLECTION_ENABLE__" , "-include" , reflection_macro_file_path, };
我们将所有clang相关的代码封装在Parser类中,写出解析代码的工程的主函数:
1
2
3
4
5
6
7
8
9
10
11
12
13
14
15
16
17
18
19
20
21
22
23
24
25
26
27
28
29
30
31
32
33
34
35
36
37
38
39
40
41
42
43
44
45
46
47
48
49
50
51
52
53
54
55
56
57
58
59
60
61
62
namespace fs = std::filesystem;void save_file (const fs::path &output_dir, const std::string &filename, const std::string &content) std::ofstream output_impl_stream (output_dir / filename) ; output_impl_stream << content; output_impl_stream.close (); } int main (int argc, char **argv) std::vector<std::string> input_files = ; fs::path output_dir = ; if (!fs::exists (output_dir)) { fs::create_directory (output_dir); } fs::path reflection_macro_file = ; auto reflection_macro_file_path = reflection_macro_file.string (); std::string output_header_filename = output_dir / "refl_generate.h" ; std::string output_impl_filename = output_dir / "refl_generate.cpp" ; fs::path base_dir = output_dir.parent_path () / "src" ; ImplMustacheFormat format; format.header_file = output_header_filename; for (const auto &file : input_files) { Parser parser (extraArgs) ; Node *root = parser.ParseFile (file); std::cout << "Parsing file: " << file << std::endl; if (root->children.empty ()) { delete root; continue ; } fs::path relative_path = fs::relative (file, base_dir); std::string filename = relative_path.string (); Utils::Replace (filename, "../" , "" ); auto func_name = Utils::SubStrBefore (filename, '.' ); Utils::Replace (func_name, '\\' , '/' ); Utils::Replace (func_name, "./" , "" ); Utils::Replace (func_name, '/' , '_' ); const auto &code = GenerateCode (filename, func_name, root); const auto &final_filename = func_name + ".h" ; format.refl_header_files.push_back (final_filename); format.func_calls.push_back (std::format("Register_{}_ReflInfo" , func_name)); save_file (output_dir, final_filename, code); delete root; } const auto &header_code = MustacheManager::Instance ().RenderHeaderFile (); const auto &impl_code = MustacheManager::Instance ().RenderImplFile (format); save_file (output_dir, output_header_filename, header_code); save_file (output_dir, output_impl_filename, impl_code); return 0 ; }
其中,程序需要获得的参数由命令行传递。在使用时,结合Cmake的add_custom_command传递参数,并用add_dependencies确保每次生成引擎项目前,都跑一遍解析器来自动生成反射代码,加入引擎项目中。
以上反射系统与代码生成器在工程项目中的整合,可以参考我的仓库 。